DIYU: DIY Printing on Fabric (The Easy Way)
Well, hello there! {waves} It's a pleasure to meet you all! I am Citlalli, the gal behind Sew Beastly. I hand-make accessories that are functional, eco-friendly, and fun, too! I blog about, inspiration, indie biz, and pretty much anything that sparks emotion in me. Come by, stay a while, and let's connect!
Ready? Let's get this started!!
CUT
Grab the pattern you just drew, fold it in half and cut the shapes out with your xacto knife. I folded it in order to make two stencils. One for the front of the tank top, and one for the back.
Now, I couldn't be more excited about being a guest contributor here, in DIY University...such an honor! I have known and admired Jenelle for a little while now, and am humbled + amazed at everything she does for Mother Earth...Thanks Jenelle!
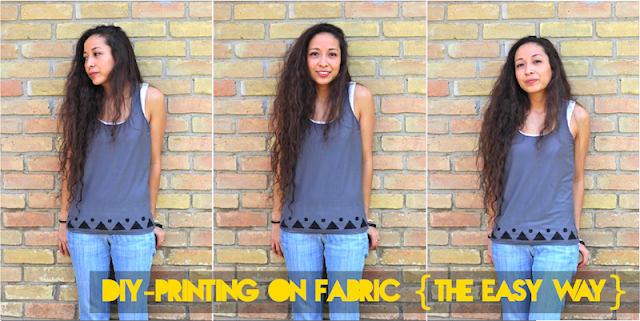
Today we're going to learn a simple way to print on fabric in six easy steps. This tutorial is great for those plain tees you have in your closet. Got a stained shirt? Print a pattern on top of it and voila! Problem solved!
I picked out a tank top that needed a bit of sprucing up, you can use whatever your heart desires.
Ready? Let's get this started!!
- Any shirt you might want to customize. I made myself a tank top with some leftover knit fabric I had in my stash, but any shirt will do.
- Freezer paper. This is what we will be using to make our stencil. You can buy this at any grocery store for about $2
- Fabric paint. I chose Jacquard's Neopaque Fabric Paint. They have a great selection over at Dharma Trading Co., and the folks over there are incredibly helpful with any questions you might have.
- Xacto knife
- Foam paint brush
- Iron {not pictured}
- Spare newspaper/paper/cardboard. {not pictured}
DRAW YOUR PATTERN
Cut a piece of freezer paper {big enough to fit two of your patterns/designs} and draw your design on the non-glossy side. I decided on a simple geometric pattern.
Cut a piece of freezer paper {big enough to fit two of your patterns/designs} and draw your design on the non-glossy side. I decided on a simple geometric pattern.
CUT
Grab the pattern you just drew, fold it in half and cut the shapes out with your xacto knife. I folded it in order to make two stencils. One for the front of the tank top, and one for the back.
Unfold, and trim the edges so they are straight and therefore easier to align with your tank top. Make sure to watch those fingers! ;] {Can you tell I'm accident prone?}
ALIGN & IRON YOUR STENCIL ON
Grab your stencil and arrange/align with your tank top.
Get your iron and iron it on. Now, it's very important that the glossy side is facing your tank top, you will end up with a sticky mess on your iron if the glossy side touches it. Let's just say it's no fun to clean up this kind of mess.
Grab your stencil and arrange/align with your tank top.
Get your iron and iron it on. Now, it's very important that the glossy side is facing your tank top, you will end up with a sticky mess on your iron if the glossy side touches it. Let's just say it's no fun to clean up this kind of mess.
4. Get your tank top and put some spare newspaper in between front and back sides so your paint doesn't bleed onto the other side. Cardboard is probably the best to use.
PAINT ON!
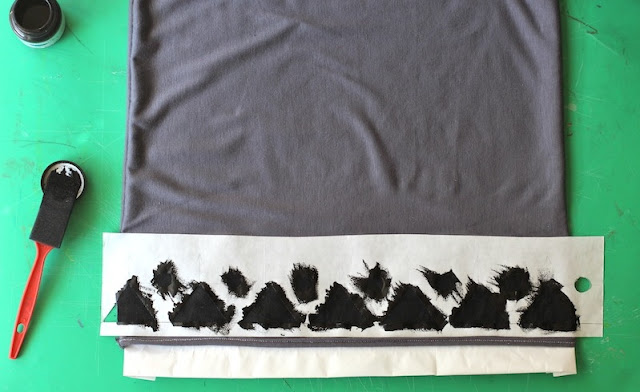
Now comes the fun part: Get your fabric paint, foam brush and blot away! I prefer to bloat the paint on to prevent my stencil from shifting, and especially if your fabric has some stretch to it.
Now comes the fun part: Get your fabric paint, foam brush and blot away! I prefer to bloat the paint on to prevent my stencil from shifting, and especially if your fabric has some stretch to it.
6. Hang to dry, peel your stencil off, and follow your fabric paint's instructions on how to set your paint.
Pat yourself on the back!! You just printed your own design on a tank top!!
Now, that was pretty easy wasn't it? I hope you enjoyed this DIY and are ready to try this technique out on more projects. I actually like to label my kitchen towels with "hands" and "dishes" to keep them from getting mixed up. {Hey, everyone's a little OCD, right?}
Maybe you can swing by and show us what else you used this technique for?
Maybe you can swing by and show us what else you used this technique for?
Thanks again for having me over, Jenelle!!


Comments
Post a Comment