DIYU: Refashioning a Maxi Dress
We've covered a lot of sewing basics this week including, How to Thread Your Sewing Machine, Embroidery Stitches, and Sewing on Paper. Today Leila is sharing a great tutorial to refashion a maxi dress and she covers essentials for sewing with knit material.
by Leila Breton from threedresses.org
When
I want to make something quick, I often turn to refashioning thrift
store finds. There are also some things I don't really enjoy sewing. One
of the big ones is ruffles. Call me crazy but they drive me batty.
I
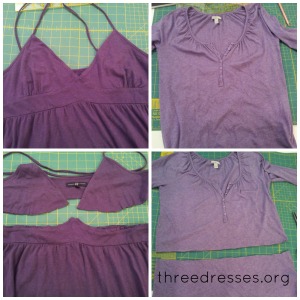
bought a second hand maxi dress in a great purple knit. It had
spaghetti straps and the cups weren't going to fit me but the skirt
would fit perfectly. The next thing I needed was a t-shirt that would
coordinate with the purple maxi. I went for a heathered long sleeve
jersey top. Here's how I cut them apart and made a maxi dress that would
fit my bust.
This is what it'll look like when we're done. It's
still too chilly to wear this dress which is why I've got a scarf on but
soon enough it'll be warm again.
When
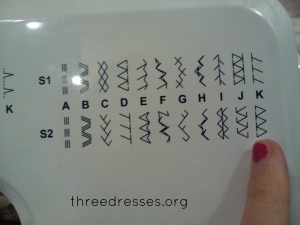
sewing with knits, you need to use a zig zag stitch or another stretch
stitch. I like using this stitch, K on my machine but I hear wonders of
the lightening bolt stitch.
I
started with the dark purple maxi on the left and the lighter purple
raglan t-shit on the right. I like raglans for refashions because then I
don't have to alter the shoulder seam to fit me.1. Cut off the top bodice of your maxi dress, leaving the midriff section.
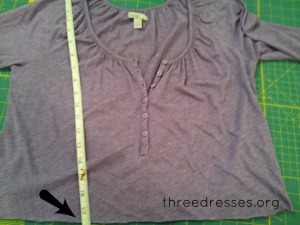
2. Cut the t-shirt so that you end up with the amount needed for your bust.
How did I figure that out?
You can try it on and mark it with chalk or fabric marker, or measure from your shoulder to your underbust and then, as shown below, mark that point and cut, making sure to leave a seam allowance of 1/2".
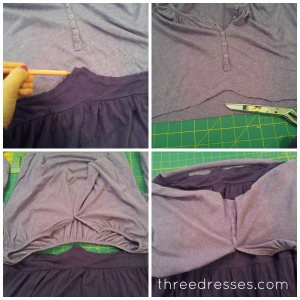
3. Curve your t-shirt raw edge to match the midriff, if your dress had a curved midriff. If not, continue to step 4. To curve the t-shirt, I drew in my stitching line by placing the midriff on top and drawing directly on to my t-shirt. Cut, leaving a 1/2" seam allowance.
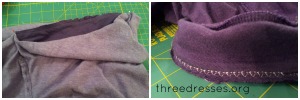
4. Turn your t-shirt inside out and flip it so the neck opening faces you.
5. Slip the t-shirt over the maxi.
6. Match up the side seams of the t-shirt and maxi. If you have excess in front, like I did, pleat the area of fullness to your liking. The pleats will really only be useful for this stitching line as you'll be adding a bodice band that will then hide your pleats. Stitch the t-shirt and maxi together.
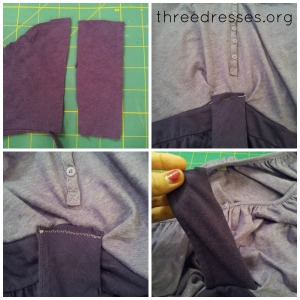
7. Cut, on grain, a piece of contrasting or same as t-shirt, piece about 2" x 5".
8. Pin your 2x5 band to the top of the midriff and stitch. I used white thread so you could see the stitching best but feel free to use matching thread. It won't show either way so it won't matter that much, so long as it doesn't bother you.
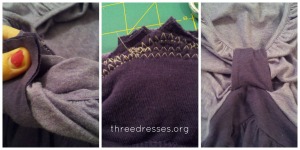
9. Flip your band up, over and into the t-shirt neckline. You're going to be securing the raw edge to the inside, while creating bust gathering.
10. Pin to the tip of the midriff section where you stitched the other raw edge on the front. Stitch it in place.
You're done! If you're full busted, this look will gently drape over your body while still creating some shaping for a fit I personally like.
Connect with Lelia
Happy Friday! What DIY craftcapades are you up to this weekend? Are you trying something new? Tell us in the comments below.




Comments
Post a Comment